
JOURNAL
Project Setup & Azure Configuration for Voice Live (Part 2 of 7)
Part 2 of 7 — From zero to a working Azure Foundry Voice Live connection in under 30 minutes. Covers resource provisioning, region selection for minimum latency, authentication, and your Next.js project scaffold.
On this page
Setting up Azure Foundry Voice Live correctly from the start saves hours of debugging later. This part walks you through every configuration decision — from choosing the right Azure region (which directly impacts your latency) to scaffolding a Next.js project with the exact structure needed for production-grade WebSocket proxying.
Step 1: Create an Azure AI Foundry Resource
Prerequisites
- Azure account with a subscription (free tier works for initial testing)
- Access to Azure AI Foundry — request access if needed as GPT-4o Realtime Audio is a gated capability
Provision the Resource
- Go to portal.azure.com
- Search for Azure OpenAI and click Create
- Fill in:
- Resource group: Create new — e.g.,
rg-interview-voice - Region: (Critical — see the region guide below)
- Name: e.g.,
interview-voice-openai - Pricing tier:
Standard S0
- Resource group: Create new — e.g.,
- Click Review + Create → Create
Important: Not all regions support the
gpt-4o-realtime-previewmodel. See the region guide below.
Deploy the Model
After the resource is created:
- Open ai.azure.com → select your hub
- Go to Deployments → Deploy model
- Select
gpt-4o-realtime-preview - Set deployment name:
gpt-4o-realtime(we’ll use this in code) - Set capacity to at least
100K tokens per minutefor development
Step 2: Choose the Right Region for Your Users
Region selection is the single most impactful configuration decision for latency.
Supported Regions for GPT-4o Realtime Audio
| Region | Azure Name | Best For |
|---|---|---|
| East US | eastus |
US East Coast |
| West US 2 | westus2 |
US West Coast |
| East US 2 | eastus2 |
US East backup |
| Australia East | australiaeast |
Australia, Southeast Asia |
| North Europe | northeurope |
UK, Northern Europe |
| Sweden Central | swedencentral |
EU (GDPR preferred) |
Latency From Southeast Asia (Vietnam, Singapore, Thailand)
| Azure Region | Typical Round-Trip |
|---|---|
| Australia East | 60–90ms ✅ |
| Southeast Asia (Singapore) | 20–40ms ✅✅ |
| East US | 180–250ms ⚠️ |
| West Europe | 200–280ms ❌ |
Recommendation: For users in Southeast Asia, use Australia East or Southeast Asia (if/when the model becomes available there). Check Azure latency test with your specific target region.
Retrieve Your Endpoint and API Key
- Go to your Azure OpenAI resource → Keys and Endpoint
- Copy:
- Endpoint:
https://interview-voice-openai.openai.azure.com/ - Key 1: Your API key (treat as a secret)
- Endpoint:
Step 3: Scaffold the Next.js Project
npx create-next-app@latest interview-voice-system \
  --typescript \
  --tailwind \
  --app \
  --src-dir \
  --import-alias "@/*"

cd interview-voice-system
Install Dependencies
# WebSocket client (for the server-side proxy)
npm install ws

# Type definitions
npm install -D @types/ws

# Environment variable validation
npm install zod
Project Structure
interview-voice-system/
├── src/
│   ├── app/
│   │   ├── page.tsx                    # Interview UI
│   │   └── api/
│   │       └── voice/
│   │           └── route.ts            # WebSocket proxy
│   ├── hooks/
│   │   └── useVoiceLive.ts             # Core voice hook
│   ├── lib/
│   │   ├── audio.ts                    # Audio utilities
│   │   └── voice-live-protocol.ts      # Azure message types
│   └── components/
│       ├── VoiceIndicator.tsx          # Visual VAD indicator
│       └── InterviewSession.tsx        # Main interview UI
├── .env.local                          # API keys (never commit)
└── next.config.js
Configure Environment Variables
Create .env.local:
# Azure OpenAI — Voice Live
AZURE_OPENAI_ENDPOINT=https://interview-voice-openai.openai.azure.com/
AZURE_OPENAI_API_KEY=your_api_key_here
AZURE_OPENAI_DEPLOYMENT=gpt-4o-realtime
AZURE_OPENAI_API_VERSION=2024-10-01-preview

# App
NEXT_PUBLIC_APP_URL=http://localhost:3000
Add to .gitignore:
.env.local
.env.*.local
Validate Config on Startup
Create src/lib/config.ts:
import { z } from 'zod';

const envSchema = z.object({
  AZURE_OPENAI_ENDPOINT: z.string().url(),
  AZURE_OPENAI_API_KEY: z.string().min(32),
  AZURE_OPENAI_DEPLOYMENT: z.string().default('gpt-4o-realtime'),
  AZURE_OPENAI_API_VERSION: z.string().default('2024-10-01-preview'),
});

const _env = envSchema.safeParse(process.env);

if (!_env.success) {
  console.error('❌ Invalid environment variables:', _env.error.format());
  throw new Error('Invalid environment variables');
}

export const env = _env.data;
Step 4: Configure Next.js for WebSocket Support
Next.js App Router doesn’t natively support upgrading HTTP connections to WebSockets in route handlers. We need to use the Node.js HTTP server directly.
Update next.config.js:
/** @type {import('next').NextConfig} */
const nextConfig = {
  // Required for WebSocket proxy in App Router
  experimental: {
    serverComponentsExternalPackages: ['ws'],
  },
  async headers() {
    return [
      {
        source: '/api/voice',
        headers: [
          { key: 'Connection', value: 'Upgrade' },
          { key: 'Upgrade', value: 'websocket' },
        ],
      },
    ];
  },
};

module.exports = nextConfig;
Create a custom server server.js at project root to handle WebSocket upgrades:
const { createServer } = require('http');
const { parse } = require('url');
const next = require('next');
const { WebSocketServer } = require('ws');

const dev = process.env.NODE_ENV !== 'production';
const app = next({ dev });
const handle = app.getRequestHandler();

app.prepare().then(() => {
  const server = createServer((req, res) => {
    const parsedUrl = parse(req.url, true);
    handle(req, res, parsedUrl);
  });

  // WebSocket server for voice proxy
  const wss = new WebSocketServer({ noServer: true });

  server.on('upgrade', (request, socket, head) => {
    const { pathname } = parse(request.url);
    if (pathname === '/api/voice') {
      wss.handleUpgrade(request, socket, head, (ws) => {
        wss.emit('connection', ws, request);
      });
    } else {
      socket.destroy();
    }
  });

  wss.on('connection', async (clientWs, request) => {
    // Import and run the voice proxy handler
    const { handleVoiceProxy } = await import('./src/lib/voice-proxy.js');
    handleVoiceProxy(clientWs, request);
  });

  server.listen(3000, () => {
    console.log('> Voice interview server ready on http://localhost:3000');
  });
});
Update package.json:
{
  "scripts": {
    "dev": "node server.js",
    "build": "next build",
    "start": "NODE_ENV=production node server.js"
  }
}
Step 5: Define Azure Voice Live Protocol Types
Create src/lib/voice-live-protocol.ts:
// Azure Voice Live WebSocket message types

export type AudioFormat = 'pcm16' | 'g711_ulaw' | 'g711_alaw';

export interface SessionConfig {
  type: 'session.update';
  session: {
    modalities: ('text' | 'audio')[];
    instructions: string;
    voice: VoiceOption;
    input_audio_format: AudioFormat;
    output_audio_format: AudioFormat;
    input_audio_transcription?: {
      model: 'whisper-1';
    };
    turn_detection: TurnDetectionConfig | null;
    temperature?: number;
    max_response_output_tokens?: number;
  };
}

export type VoiceOption =
  | 'alloy' | 'echo' | 'shimmer' | 'ash'
  | 'ballad' | 'coral' | 'sage' | 'verse';

export interface TurnDetectionConfig {
  type: 'server_vad';
  threshold: number;         // 0.0–1.0, default 0.5
  prefix_padding_ms: number; // ms of audio before speech, default 300
  silence_duration_ms: number; // ms of silence to end turn, default 500
}

export interface AudioAppendMessage {
  type: 'input_audio_buffer.append';
  audio: string; // Base64-encoded PCM audio
}

export interface ResponseCreateMessage {
  type: 'response.create';
  response?: {
    modalities: ('text' | 'audio')[];
    instructions?: string;
  };
}

// Response message types from Azure
export type ServerMessage =
  | { type: 'session.created'; session: Record<string, unknown> }
  | { type: 'session.updated'; session: Record<string, unknown> }
  | { type: 'response.audio.delta'; delta: string; response_id: string }
  | { type: 'response.audio.done'; response_id: string }
  | { type: 'response.text.delta'; delta: string }
  | { type: 'response.done'; response: Record<string, unknown> }
  | { type: 'input_audio_buffer.speech_started' }
  | { type: 'input_audio_buffer.speech_stopped' }
  | { type: 'error'; error: { type: string; message: string } };
Step 6: Verify Your Connection
Create a quick test script test-connection.ts:
import WebSocket from 'ws';

const endpoint = process.env.AZURE_OPENAI_ENDPOINT!;
const key = process.env.AZURE_OPENAI_API_KEY!;
const deployment = process.env.AZURE_OPENAI_DEPLOYMENT!;
const apiVersion = process.env.AZURE_OPENAI_API_VERSION!;

const url = `${endpoint.replace('https://', 'wss://')}/openai/realtime?api-version=${apiVersion}&deployment=${deployment}`;

const ws = new WebSocket(url, {
  headers: { 'api-key': key },
});

ws.on('open', () => {
  console.log('✅ Connected to Azure Voice Live!');

  // Send session config
  ws.send(JSON.stringify({
    type: 'session.update',
    session: {
      modalities: ['text', 'audio'],
      instructions: 'You are a helpful assistant.',
      voice: 'alloy',
      input_audio_format: 'pcm16',
      output_audio_format: 'pcm16',
    },
  }));
});

ws.on('message', (data) => {
  const msg = JSON.parse(data.toString());
  console.log('📨 Received:', msg.type);
  if (msg.type === 'session.created') {
    console.log('✅ Session created! You are ready to send audio.');
    ws.close();
  }
});

ws.on('error', (err) => {
  console.error('❌ Connection error:', err.message);
});
Run with:
npx ts-node --esm test-connection.ts
Expected output:
✅ Connected to Azure Voice Live!
📨 Received: session.created
✅ Session created! You are ready to send audio.
Common Setup Errors
| Error | Cause | Fix |
|---|---|---|
401 Unauthorized |
Wrong API key | Check .env.local key matches Azure portal |
404 Deployment not found |
Wrong deployment name | Must match exact deployment name in Azure |
Region not supported |
Model not available in region | Switch to East US or Australia East |
Connection refused |
Wrong endpoint format | Ensure wss:// not https:// |
ECONNREFUSED |
server.js not running |
Use npm run dev not next dev |
Next: Part 3 — Next.js Integration: WebSocket & Audio Streaming →
← Part 1 — Architecture Overview | This is Part 2 of the Azure Voice Live series.
Related reading

25 Sep 2026 · 4 min read
ai
Entra Agent ID Is Microsoft's Bet That Identity Beats Sandboxing
Microsoft's September 23 post on agent-first platforms ties Entra Agent ID, Foundry, and hardware-isolated Container Apps sandboxes together. KPMG runs 30,000 concurrent sandboxes on it. Here's whether identity-first actually changes anything over sandboxing alone.
Read more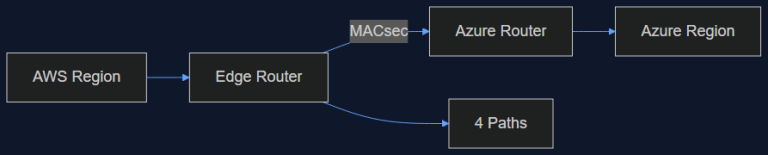
16 Sep 2026 · 4 min read
ai-infrastructure
AWS Just Opened a Private Pipe Straight Into Azure. Here's Why an AI Team Should Care
AWS Interconnect – multicloud with Azure went into preview in August, capped at 1 Gbps and four regions. That's not enough bandwidth for training, but it's exactly enough to fix the multi-vendor inference problem we've been duct-taping for a year.
Read more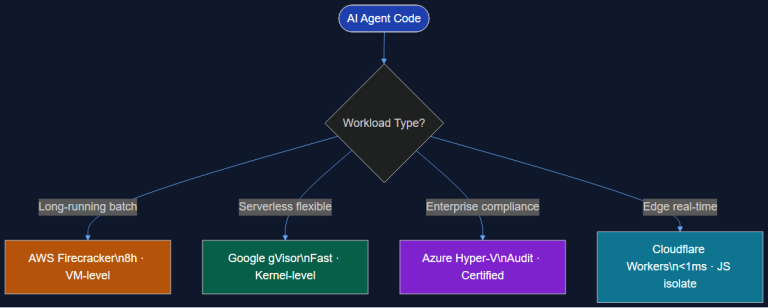
28 Jul 2026 · 6 min read
ai
Cloud Agent Sandboxes: How AWS, Google, Azure, and Cloudflare Handle Isolated Code Execution
All four major clouds shipped agent code sandboxes in the same quarter. Four isolation architectures, four trade-off profiles. Here's the technical comparison and decision framework for Tech Leads picking the right sandbox for their AI stack.
Read more
Discussion
Comments are reviewed before publication. Your email is kept private.